Plumbing Services

How to Tell If You Have a Plumbing Leak

A plumbing leak can cause a lot of problems for homeowners. They can lead to water damage, mold growth, and high water bills.

It is important to detect a leaky pipe early to fix it quickly. There are a few ways to do this, including checking the water meter. Click here to Learn More.

plumbing

One of the first indicators that you leak is when you notice an increase in your water bill. Water leaks aren’t a cheap problem to ignore, and if they are left unchecked, they can lead to water damage that requires costly repair and cleaning services. But the good news is that you can often catch these leaks early on by checking your water meter for signs of a leak.

Water meters are designed to help you check on your water usage so that you know whether you have a leak in your plumbing system or if there’s a billing issue with your utility provider. A simple inspection of your meter can tell you what the problem is, and it’s much cheaper than calling in a plumber for an investigation.

The first step is to make sure that all of the water use sources in your home are turned off. This includes faucets, ice makers, dishwashers and washing machines. You should also shut off the water to your showers and any tubs that you have. Once you’ve made sure that all of the water is off, you can go to your water meter and look at the dials. You should be able to see a small pinwheel with black and silver stripes or a triangle dial on your water meter that shows whether you’re using any water.

If you notice that the meter is turning even though you’re not using any water, you have a leak somewhere in your house. It could be in the pipes between your meter and your house, or it might be inside the walls. If you can’t find the source of the leak in your house, you can also try examining the yard for soft or muddy areas and water spots that might indicate where a pipe has burst.

Remember, as a homeowner, you are responsible for the lines that run from your house to the water meter. If you do find a leak in these lines, it’s going to be the responsibility of your property owner to fix this problem for you.

We all rely on water to keep us clean, healthy, and comfortable. But, it can quickly become the enemy if it starts to go where it shouldn’t. Leaks can cause significant damage to your home and belongings if you’re not careful. If you notice water stains on the ceiling, walls, or floors in rooms where it doesn’t belong, there’s a good chance that you have a plumbing leak.

It may be difficult to identify at first because of the deceptive sounds that leaking water can make. These sounds can include a scratching or rushing sound that isn’t usually associated with water. It’s important to listen closely when your house is quiet, such as at night time when the traffic outside is minimal and most people are sleeping. The sounds of a leaking pipe can also take on a high-pitched whine or a loud bang.

Another sign of a leak is damp or soft drywall in areas where it shouldn’t be. In some cases, the drywall can even start to rot away. The stale moisture can also create the perfect conditions for mold and mildew to grow in your home. This can be a health hazard, especially for those with allergies or sensitivities. A musty odor in rooms where there isn’t an obvious source is also a good indicator of a hidden leak somewhere.

Increasingly high water bills are one of the most common signs of a leak. A leaky pipe could be guzzling up to 90 gallons of water per day, which can quickly add up. If your water bill has suddenly climbed, it’s a good idea to call in a plumber to investigate and find the source of the leak.

In addition to wasting money, water leaks can also lead to other problems in your home. For example, a water leak can create the ideal conditions for the growth of mold and mildew. These spores can spread quickly and can be hard to get rid of. The best way to deal with this issue is to stop the leak as soon as possible, and to have any damaged drywall or flooring replaced immediately.

While most plumbing leaks occur around toilets, sinks and showerheads, they can also happen behind walls or under the floor. These hidden leaks are particularly dangerous because they go unnoticed for long periods of time and can cause extensive water damage. Fortunately, a little knowledge and quick action can help prevent these hidden disasters.

When you discover a plumbing leak, the first step is to shut off your home’s water supply. If you can’t find the water valve, turn off your home’s main water line at the breaker box. Once the water is turned off, it’s time to start cleaning up.

You can use a wet vac or mop up the water in the affected area. It’s important to get the area as dry as possible to prevent structural damage to your home and to avoid mold growth.

Once the area is cleaned up, it’s time to dry out the pipes. This involves opening windows, doors and cabinets, running fans and using a dehumidifier to remove the excess moisture. This can take two-to-three days, but it’s necessary to avoid structural damage and unhealthy mold growth.

Leaking pipes can be caused by a number of problems, including corrosion, poor installation or old age. However, a common cause of pipe leaks is sudden temperature changes. These rapid changes cause the expansion and contraction of the piping and can result in cracks or leaks.

If you suspect a pipe leak, have a plumber inspect the area and repair it as soon as possible. A leaky pipe can cause serious water damage and increase your water bills substantially.

Most pipe leaks are easily fixed by a professional plumber, but there are some DIY solutions that can help. One option is to use epoxy putty to seal the area around a leaky pipe. Before applying the putty, make sure that the involved pipes are completely drained and clean. Follow the manufacturer’s instructions to ensure that the putty cures properly. This simple fix will save you money on your utility bills and protect your home from expensive and hazardous mold growth.

Whether it’s a slow drip under the sink or a gushing pipe in your ceiling, you shouldn’t ignore any plumbing problem. A plumber will be able to diagnose and repair the issue before it gets worse.

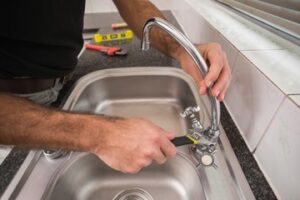
The first thing you should do when a leak becomes apparent is shut off the water to the fixture. If it’s a serious leak, you should also shut off the water at your house’s main valve. If you aren’t sure where the leak is coming from, a plumber can use a variety of tools to pinpoint it and determine what is causing the leak.

If you have a leak, you should call your plumber as soon as possible to schedule an appointment for a repair. If you can’t afford to wait until the morning, consider calling an emergency plumber who will be available on the weekend or after-hours.

Leaks that cause a significant amount of water damage can be costly, especially if you have to pay for emergency services and replacement parts. They can also lead to serious health problems, such as mold, and can result in a rotting home structure. Having an experienced plumber deal with the problem right away is the best way to minimize the damage and save money.

Even if you have no obvious signs of a leak, it’s always worth checking under sinks, around toilets and behind water-use appliances. A plumber can check for hidden leaks with the help of specialized equipment and can deal with them more quickly and efficiently than you could manage alone.

Plumbing leaks waste a lot of water. A simple drip can add up to tens of gallons each day, which means you’re paying for water that isn’t getting used. The EPA estimates that 10% of homes have leaks that waste 90 gallons or more each day. In addition to wasting water, leaks can cause damage to your property and make it difficult to sell your home. If you think you have a leak, it’s important to act quickly before the problem gets out of hand.

Plumbing Services

How to Avoid Plumbing Installation Problems

Plumbing is the system of pipes and fixtures that provide a safe and reliable water supply and remove waste. Plumbers Medina is regulated by laws and codes that ensure safety and quality.

The plumbing in your home starts with large pipes that carry city water from a main line in the street to each house. Then, the pipes branch off to connect to your appliances and drains.

plumbing

Water supply lines are responsible for transporting fresh water from the main line to sinks, toilets, showers, and other plumbing fixtures. They’re essential for delivering clean, safe, and reliable water to homes and buildings. However, supply lines can be prone to issues such as low water pressure and leaks if they’re not installed correctly. To avoid these problems, follow the guidelines below when installing or repairing plumbing supply lines:

Properly sized water supply lines are critical to maximizing your plumbing system’s performance and longevity. Undersized lines restrict water flow, leading to low water pressure at your plumbing fixtures and causing excess stress on your pipes. This can result in weakened joints and leaks. By following sizing guidelines and hiring a professional to perform accurate measurements, you can ensure your supply lines are properly sized for your plumbing needs.

Different fixture types and areas may require varying supply line sizes to achieve optimal performance. This is especially true for high-demand appliances, like water heaters and washing machines. Properly sized supply lines ensure even and consistent water flow, helping your plumbing system save energy and improve performance.

Plumbing pipe comes in a variety of shapes, sizes, and materials to suit specific applications. The best choice for your project depends on a number of factors, including physical conditions, local codes, and your client’s preferences and budget. For instance, if you’re working on a residential plumbing installation or replacement job, you might prefer to use copper over PVC or PEX because it’s more durable and cost-effective. On the other hand, if you’re building a commercial plumbing project, it may be more practical to use flexible stainless steel piping because it’s easier to install and maintain.

Once you’ve chosen your plumbing pipe, it’s important to follow proper installation techniques to create a watertight seal. For example, you should always use thread tape rather than pipe dope when connecting a valve to a supply line. This is because pipe dope can melt or crack, while thread tape is designed to hold securely in place even when subjected to vibrations and temperature fluctuations.

The drain lines in your home carry wastewater and solid waste away from plumbing fixtures to the main sewer line or septic system. These lines are buried beneath your house, and they’re usually out of sight and mind until they’re clogged or damaged. Fortunately, understanding what can go wrong with your drain lines can help you prevent costly problems and keep them running smoothly.

A residential plumbing system typically has two types of drain lines: the main line and the branch line. A main drain line carries all household wastewater from toilets, bathtubs, showers, sinks and laundry appliances to the sewer line. Depending on where your home is located, the line may connect to a city sewer main or a private septic tank. A clogged main drain can lead to messy, toxic sewage backups in your home, so it’s important to recognize the warning signs and call a plumber when they appear.

During a new plumbing installation, the plumbing contractor sets all the pipes that are needed for supply and drainage systems before framing any walls or installing flooring. This includes rough-in drain fittings for bathtubs and showers, as well as sink and toilet flanges. Fixtures like toilets and showers are set to be installed last after the wall frames have been hung.

All drain lines must be sloped properly to ensure proper drainage and a tight seal. The ideal slope is 1/4 inch for every foot of pipe length. If your drain lines are not sloped correctly, they can clog frequently. This can lead to the use of harsh chemical drain cleaners or frequent calls to your local plumber for unclogging services.

All drain lines should also have a water barrier or trap in place. These are called “p-traps” and they’re typically made of PVC or ABS plastic. The water in the trap acts as a seal that keeps sewer gases and other unpleasant odors from entering your home. The maximum distance a drain line can run from a fixture to the trap is 48″. If a longer distance is used, the force of the wastewater could displace the water in the trap and allow sewer gas into your home.

Your home’s plumbing system is designed to remove water and waste efficiently. Its drainage and vent functions work together to make this happen. The drainage pipes carry waste away from your home to the city sewer line or septic tank, while the vent lines ensure fresh air gets into the drain pipes so that waste can move freely. The ventilation system is vital to preventing a buildup of water and sewer gases that could otherwise be dangerous for your family.

When a home’s vent piping becomes clogged, it can lead to slow-draining fixtures and foul odors. It can also cause gurgling sounds from drains and toilets. If you’re experiencing any of these issues, your vent piping may need to be replaced. To learn more about the function and importance of this sensitive part of your plumbing system, read on.

The vent lines in a plumbing system play an important role in keeping your drains flowing smoothly and protecting your family from hazardous fumes. When installed properly by a professional plumbing service company, the vents strike a balance between negative and positive air pressure to protect the trap seals in your plumbing drains. If negative pressure occurs, the air from the vent will enter the drainage pipe and break the siphon effect. This will prevent the p-trap from filling with wastewater and allowing sewer gas into the home.

However, if the p-trap is filled with water or the ventilation system has been installed incorrectly, it will not be possible to maintain this balance and the vents may become blocked. The best way to avoid this issue is to always hire a professional plumber for any installation or repairs to your plumbing vents.

When installing a new plumbing vent, be sure to follow local and state codes to ensure that your home is protected from future plumbing problems. Also, be sure to use the proper sized pipe for each vent so that it can easily carry waste and prevent a vacuum that could cause blockages or leaks. After installing the vent, it’s important to make sure that all of the seams are sealed and a weatherproof flashing is installed over the top to keep moisture from leaking into your home.

Whether you’re looking to upgrade your existing plumbing fixtures or install a new bathroom, kitchen, or laundry room, the right fixtures will ensure an adequate water supply and proper drainage. However, with so many options available, it can be difficult to choose the best fixtures for your needs. Before making a purchase, consider factors like energy efficiency and performance to help you select the perfect fixtures for your home.

A fixture is any device connected to a plumbing system that serves a specific purpose. Common examples include sinks, bathtubs, toilets, and showers. The pipes attached to these devices carry both water and wastewater, so it’s important that they are properly installed and inspected.

Plumbing fixtures are an essential part of any building, as they provide a means of accessing freshwater and removing waste. They’re also crucial for ensuring that buildings remain hygienic and safe. Without these systems, it would be impossible to get clean water or dispose of waste effectively.

The most common type of plumbing fixture is a sink. These are usually located in the kitchen, bathroom, or laundry room. They have a faucet that allows you to control the flow of water, and they’re also connected to a drain that carries wastewater away from the fixture.

Toilets are another important plumbing fixture, as they serve a vital function in the removal of human waste. These are typically connected to sewer or septic systems, and they use a special valve that prevents wastewater from backing up into the home’s interior.

When choosing a toilet, it’s important to consider the water efficiency and flushing capabilities of different models. It’s also important to consider any specific needs or preferences you may have, such as a low-flow model that can help reduce your water usage.

While it’s possible to paint plumbing fixtures, it’s not recommended. This is because the finish will likely wear off quickly due to constant exposure to water and moisture. Furthermore, you should only use a high-quality paint that is designed for use on plumbing fixtures.

When installing plumbing fixtures, it’s important to keep in mind that they must be CSA-approved. This is because they’re required to meet a set of standards established by the Canadian Standards Association (CSA). This includes requirements for safety, quality, and performance.

Plumbing Services

How to Repair a Faucet

Many faucet problems stem from sediment and mineral buildup, which can corrode the valve seat. In cartridge-type faucets, loose or damaged O-rings and a worn inlet or outlet seal can also cause leaks.

faucet repair

First, shut off the water. Next, remove the decorative cap from each handle using a flathead screwdriver. Once the screw is removed, place the parts in order they were removed so you can easily reassemble them. For professional help, contact Local Law 152.

Leaks are often the result of a damaged component. Rubber washers, o-rings, and gaskets are inexpensive and relatively simple to replace. Cartridges and valve seats may require a bit more effort, but they are also affordable options for restoring a faucet. Disc cartridges are harder to diagnose and replace, but once you’ve removed the old one you can often take it with you to the home improvement store for a replacement.

Faucets are subject to many different kinds of damage over time. This is mostly due to wear and tear, but sometimes the cause is more dramatic. Unusually high or low water pressure can cause the internal parts of a faucet to wear out faster than normal, causing leaks and other problems. A faucet can also be damaged by misuse or abuse, including rough handling, over-tightening of handles, and water pressure too high for the fixture.

The best way to address these problems is to start by making sure the shutoff valves beneath the sink are fully open. Then remove the handle using a screwdriver and examine the interior components for signs of wear and tear or damage. Once the handle is removed you should be able to see a cam-nut or adjustable ring (also known as a ring cap) underneath the faucet that holds the stem or cartridge in place. If the nut is loose or missing altogether, tighten it with needle-nosed pliers. If there’s a problem with the cartridge or stem, unscrew the cam-nut or adjuster ring and unscrew the plastic cam and packer to remove the cartridge and see what needs to be replaced.

If you’re replacing a cartridge, take the old one with you to the hardware store to ensure you get the right replacement. It’s also a good idea to replace the O-ring that is usually found under the cartridge, since it can easily wear out too. Make sure you coat the new O-ring with plumbers grease to prevent it from leaking or burning up on contact with hot water.

If a new seal doesn’t fix the leak, you can try tightening the valve seat with a wrench or o-ring spanner to see if that fixes it. If the faucet is corroded beyond repair or you’re looking to upgrade its features, consider replacing it entirely. A new faucet that’s more efficient will save you money and will last longer than the original, even with constant use.

Leaks

The first step in faucet repair is to locate the leak. Look for water leaking from around the base of the handle or where the handles connect to the stem. In some cases, a loose screw or worn O-ring may be the cause of the leak. Simply tightening the screw or replacing the O-ring should stop the leaking.

Another common cause of leaking is a dirty valve seat. Over time, minerals in the tap water build up and deposit on the valve seat, causing a leak. Pouring white vinegar over the valve seat and then scrubbing it should help clean it. If a DIYer is unable to fix the problem, it’s best to call in a plumber.

If the faucet leaks at certain times of day or when specific tasks are undertaken, it could be due to changes in water pressure. In this case, the excess pressure is preventing water from flowing away properly and it backs up into faucets and other parts of the house. An experienced plumber can test the water pressure and determine if it’s too high.

Once a homeowner has replaced the damaged parts and cleaned the rest of the sink, they’re ready to reassemble their faucet. It’s important that the replacement parts are an exact match to prevent a new leak from occurring in the future. The order of assembly is washer/O-ring, stem, packing nut, screw and handle. Once reassembled, it’s essential to turn the water supply back on and check for any additional leaks.

When a dripping faucet can send up to three gallons of water down the drain every day, it’s not something that should be ignored. If a DIYer is unable or unwilling to solve the issue, it’s best to call in seasoned professional plumber to do so. The Frontdoor app makes finding the right Pro fast and easy, with real-time chat for advice on home repairs or maintenance and a list of vetted local experts who can make the fixes. Get started with a free quote. Just download the app, snap a picture of your faucet and enter some basic information to receive custom estimates from nearby Pros.

Cartridge Replacement

One of the most common problems in cartridge faucets is worn-out cartridges and O-rings. These parts can become corroded or coated with hard water mineral deposits, which can lead to leaking and difficult turning of the handle(s). Replacing these parts usually fixes these issues. To replace a cartridge, first shut off the water to the faucet by turning the valve(s) clockwise. Then, remove the handle(s). This might require the use of a hex wrench, which may be included in a faucet repair kit. Once the handle is removed, you can see and reach the cartridge retaining nut. If you do not have a hex wrench, use channel-type pliers to turn the retaining nut counterclockwise until it is loose and removed. After removing the retaining nut, carefully pull the cartridge straight up to remove it from the faucet body.

Some faucets have a clip that holds the cartridge in place. If yours does, use a flat-blade screwdriver to pry the clip away from its retention slot. This will reveal two plastic tabs on the cartridge that must be precisely aligned with the corresponding notches or slots in the new cartridge to ensure a tight fit. The white plastic tool that comes with most faucet kits has a square top that will fit neatly over the cartridge stem to help you grasp it and pull it out.

Once you’ve loosened the cartridge and removed it, take the new replacement and install it in the faucet by slipping it into its slot(s). Make sure the notches in the cartridge match the corresponding notches on the sleeve. If the sleeve does not fit tightly, it will leak. If you installed the cartridge correctly, it should click into place and be snug.

Once the new cartridge is in, put the retaining nut back on and reattach the handle(s). Replace the decorative collar (if present) and screw the handle(s) on. Open the water valve(s) and test the faucet for proper operation. If any other parts need replacing, do so now. They don’t make faucets like they used to, but replacement parts are available for most brands and styles at hardware stores, home centers and plumbing supply centers. If you’re unsure what type of faucet you have, it is best to shut off the water and disassemble the fixture before buying replacement parts. This will assure a perfect fit and help you avoid expensive mistakes.

Handle Replacement

Replacing the faucet handle is an inexpensive, straightforward way to update the look of a bathroom. It also can be a troubleshooting step when a cartridge has been replaced and the handle is still leaking or difficult to turn.

Before attempting to replace the handle, turn off the water supply valves beneath the sink. Look under the sink for these valves, which typically are located on either side of the faucet cartridge, and close them by turning the knobs clockwise to shut off the water flow. This will help prevent scalding injuries and ensure that any work you do will not affect the water in your home.

Shut off the water supply at the house shutoff valves, too, if your faucet is a single-handle model that doesn’t have separate shut-offs for each hot and cold. Whether you’re working on a double- or single-handled faucet, it’s essential to shut off the water so that you don’t accidentally damage any components while trying to fix the leaky one.

Examine the faucet handle to determine how it is secured to the cartridge and faucet baseplate. Many lever handles have a set screw under the curve of the handle; others have a decorative cap on the top of the handle that you must remove to access the handle setscrew. Use a flathead or Phillips-head screwdriver to remove the cap and reveal the handle setscrew underneath.

Once you’ve removed the handle, pry off the cover plate and unscrew the retaining screw at the base of the handle with an Allen wrench. You may want to label the retaining screw with a small piece of tape, such as “cartridge” or “handle,” so that you don’t lose it while installing the new handle.

Remove the handle securing screw and the handle from the faucet, then slip the replacement onto the handle and secure it with the retaining screw. Replace the handle cover plate and screw the handle back into place, ensuring that it snaps into place.

Replace the cartridge, if necessary. Make sure the new cartridge is the same type as the old one, and that it fits the cartridge holder’s hole. You may have to loosen the nut on the end of the stem in order to insert the new one, so have a set of needle-nose pliers handy to keep from scratching the spout and valve assembly with the tip of your pliers.